Adding the Kii Cloud SDK
Kii Cloud SDK gives you the ability to manage your application users and data with only a few lines of client-side code.
Kii Cloud SDK for iOS supports Objective-C and Swift. See Supported Languages for more information.
Linking the SDK
First, you need to link the Kii Cloud SDK to your project with either of the following methods:
- Using CocoaPods
- Downloading the Kii Cloud SDK by yourself
We recommend using CocoaPods, but you can also download the Kii SDK framework by yourself from the developer portal.
Using CocoaPods
Configure CocoaPods
Make CocoaPods available. See the CocoaPods guides for configuring CocoaPods.
Prepare a Podfile
Create a file named
Podfilein the directory that contains the XCode project file (the XCODEPROJ file) and put the following lines in the file.use_frameworks! target '__TargetName__' do pod 'KiiCloud', 'XX.YY.ZZ' endReplace
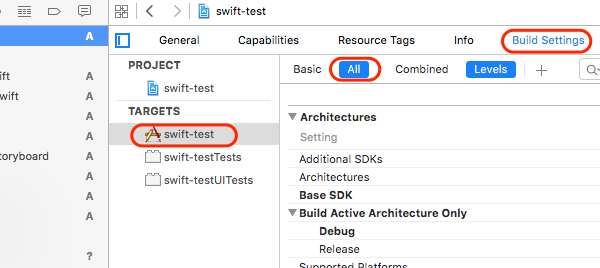
__TargetName__with the project name. You can find the project name on Xcode as illustrated in the next screenshot.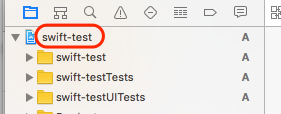
Change the
XX.YY.ZZinpod 'KiiCloud', 'XX.YY.ZZ'with the actual version you want to download. You can check the latest version number by clicking the "Download" link in the developer portal.Download the Kii Cloud SDK
Open Terminal and move to your project directory.
In order to download the Kii Cloud SDK and make it referenceable from your project, execute the following command. This command also configures the frameworks that the Kii Cloud SDK uses internally.
$ pod installThis command creates a workspace file (an XCWORKSPACE file). This file contains information that defines the relation between the project and the SDK.
Reopen the workspace
Close the project and reopen the workspace in Xcode. To do so, choose "File" > "Open", and select the directory that includes the workspace file or select the workspace file itself and click "Open".
The SDK is not correctly referenced by the project if you open the project file. Be careful when you open the workspace file, because the welcome window of Xcode displays a project file that was most recently opened.
Downloading manually
Download the SDK
Click the "Download" link in the developer portal to open the SDK download page. Download the "Cloud SDK" for iOS.
Integrate the SDK
Unzip the downloaded ZIP file in a directory under the Xcode project.
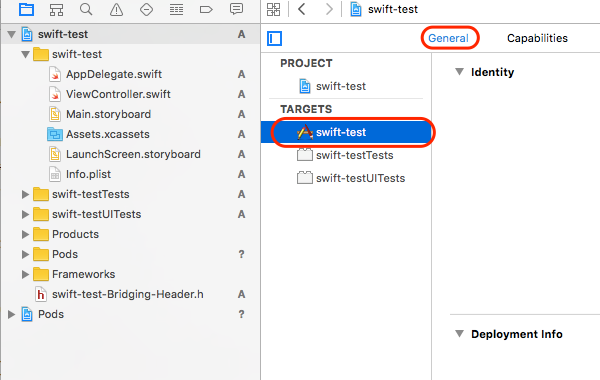
Then, select the target in the Xcode's project editor and click the "General" tab.
Scroll down and open the "Embedded Binaries" section. Click the Add button (+).
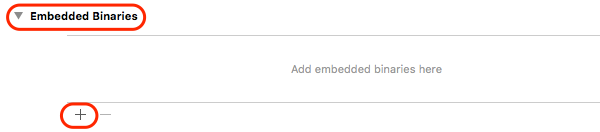
Select the "Add Other" button and specify the
KiiSDK.frameworkdirectory where you've unzipped the file.Next, scroll down and open the "Linked Frameworks and Libraries" section. Click the Add button (+).
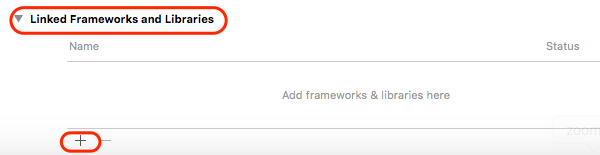
Select the "Add Others" button and specify the
KiiSDK.frameworkdirectory where you've unzipped the file.Starting from the version 2.2.0, the Analytics SDK is integrated into the Cloud SDK. If you've upgraded the version, remove
KiiAnalytics.framework, or you will get an error. Also, remove#import <KiiAnalytics/KiiAnalytics.h>andbeginWithIDmethod for KiiAnalytics from your code.Add frameworks and libraries
Open the "Linked Frameworks and Libraries" again. Click the Add button (+) and select the following frameworks and libraries:
- Accounts.framework
- ImageIO.framework
- libsqlite3.tbd
- MobileCoreServices.framework
- Security.framework
- Social.framework
Set "Other Linker Flags"
Add
-ObjCto "Other Linker Flags".Select the target in the Xcode's project editor and click the "Build Settings" tab.
Scroll down to the "Other Linker Flags" build setting under the "Linking" collection or type "Other Linker Flags" in the search bar.
Set the value of the "Other Linker Flags" build setting to
$(OTHER_LDFLAGS) -ObjC.Make sure that "Enable Modules (C and Objective-C)" is enabled
Scroll down further to the "Apple LLVM X.X - Langauge - Modules" setting or type "Enable Modules (C and Objective-C)" in the search bar.
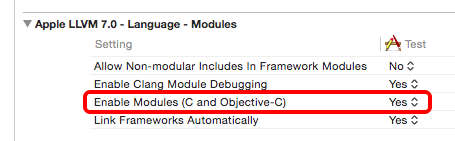
If the option is not enabled, enable it by setting the value to Yes.
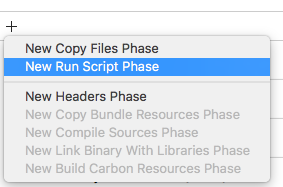
Add "Run Script"
Open the "Build Phases" tab and select "New Run Script Phase".
Open the newly created "Run Script" and paste the following script.
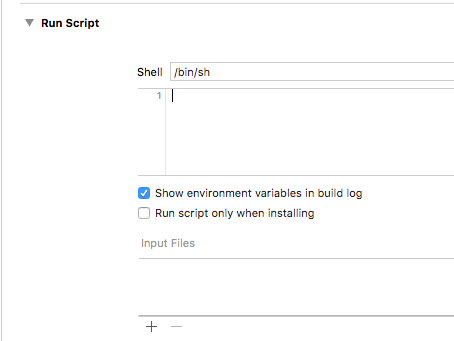
APP_PATH="${TARGET_BUILD_DIR}/${WRAPPER_NAME}"

# This script loops through the frameworks embedded in the application and
# removes unused architectures.
find "$APP_PATH" -name '*.framework' -type d | while read -r FRAMEWORK
do
    FRAMEWORK_EXECUTABLE_NAME=$(defaults read "$FRAMEWORK/Info.plist" CFBundleExecutable)
    FRAMEWORK_EXECUTABLE_PATH="$FRAMEWORK/$FRAMEWORK_EXECUTABLE_NAME"
    echo "Executable is $FRAMEWORK_EXECUTABLE_PATH"

    EXTRACTED_ARCHS=()

    for ARCH in $ARCHS
    do
        echo "Extracting $ARCH from $FRAMEWORK_EXECUTABLE_NAME"
        lipo -extract "$ARCH" "$FRAMEWORK_EXECUTABLE_PATH" -o "$FRAMEWORK_EXECUTABLE_PATH-$ARCH"
        EXTRACTED_ARCHS+=("$FRAMEWORK_EXECUTABLE_PATH-$ARCH")
    done

    echo "Merging extracted architectures: ${ARCHS}"
    lipo -o "$FRAMEWORK_EXECUTABLE_PATH-merged" -create "${EXTRACTED_ARCHS[@]}"
    rm "${EXTRACTED_ARCHS[@]}"

    echo "Replacing original executable with thinned version"
    rm "$FRAMEWORK_EXECUTABLE_PATH"
    mv "$FRAMEWORK_EXECUTABLE_PATH-merged" "$FRAMEWORK_EXECUTABLE_PATH"

done
Configuring your project
Configure your project in Xcode as follows.
Configuring the build environment
Set the OS version to support in the Xcode's Deployment Target. For the Cloud SDK version v2.6.0 or later, set the OS version to 8.0 or above.

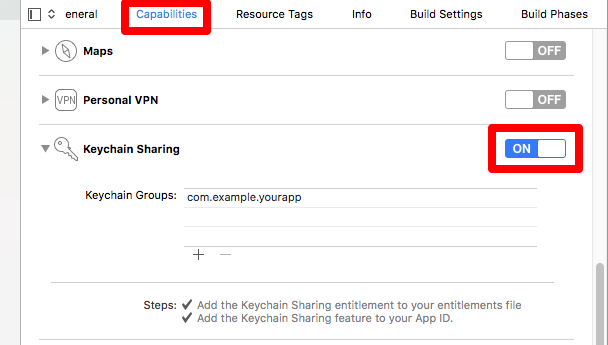
Because of a defect in Xcode, you might encounter an error that causes Simulator to fail to access the keychain. Enable "Keychain Sharing" only if you use Simulator. The Kii Cloud SDK for iOS needs to access the keychain.
Preparing your code
Read a header
Swift:
You need to add the following line to all files that will use Kii SDK:
import KiiSDKNote: Prior to v2.6.0, KiiSDK required the bridging header to work with Swift. Since v2.6.0, it does not require using the bridging Header anymore.
Objective-C:
Add the following header to all files that will use Kii SDK:
#import <KiiSDK/Kii.h>Alternatively, you can use
@importmodule.@import KiiSDK;Add the following code to your AppDelegate's
application(_:didFinishLaunchingWithOptions:)method:Swift:
private func application(_ application: UIApplication, didFinishLaunchingWithOptions launchOptions: [AnyHashable: Any]?) -> Bool {

    // Initialize the Kii Cloud SDK. Call this method before any other Kii SDK API calls.
    Kii.begin(withID: "___APPID___", andKey: "___APPKEY___", andSite: KiiSite.JP)

    // Override point for customization after application launch.
    return true
}
Objective-C:
// Application startup
- (BOOL)application:(UIApplication *)application didFinishLaunchingWithOptions:(NSDictionary *)launchOptions {

  // Initialize the Kii Cloud SDK. Call this method before any other Kii SDK API calls.
  [Kii beginWithID:@"___APPID___"
            andKey:@"___APPKEY___"
           andSite:kiiSiteJP];

  return YES;
}
Insert your application's AppID in the placeholder
___APPID___. You can put an arbitrary value in the placeholder___APPKEY___.You can safely embed the AppID in your application as long as you apply the correct access control. See Security for more information.