Executing Commands
You can control the things by sending commands from the mobile applications. The commands are processed on the things to achieve various services. See here for the overview.
Executing commands
To send a command, you will first set the parameters for each action that composes the command. Then, you will execute the method for sending the command to Thing Interaction Framework.
Prior to the execution, you need to get a ThingIFAPI instance (api) that is initialized by the steps described in Initializing and Onboarding. You also need the user ID of the user who is going to execute the command.
Here, we will show a sample code block for sending a command based on the example shown in Defining Schema.
-
// Create an action array. const actions = [ {"turnPower":{"power":true}}, {"setPresetTemperature":{"presetTemperature":25}}, {"setFanSpeed":{"fanSpeed":5}} ]; // Create a command request. const commandRequest = new ThingIF.PostCommandRequest("AirConditioner-Demo", 1, actions); // Execute the command. api.postNewCommand(commandRequest).then((command: ThingIF.Command) => { // Do something. }).catch((error: ThingIF.ThingIFError) => { // Handle the error. }); -
// Create an action array.
var actions = [
  {"turnPower":{"power":true}},
  {"setPresetTemperature":{"presetTemperature":25}},
  {"setFanSpeed":{"fanSpeed":5}}
];

// Create a command request.
var commandRequest = new ThingIF.PostCommandRequest("AirConditioner-Demo", 1, actions);

// Execute the command.
api.postNewCommand(commandRequest).then(
  function(command) {
    // Do something.
  }
).catch(
  function(error) {
    // Handle the error.
  }
);
This is what is happening in the sample code:
Prepare a set of actions to send as an array of objects
In this example, we are setting three actions that we've defined in the schema (
turnPower,setPresetTemperature, andsetFanSpeed) inactions.actionsis an array of actions. Each action is represented as an object, which is a pair of the action name and its parameter. You can specify any key-value pair as a parameter. The following figure illustrates the actions defined: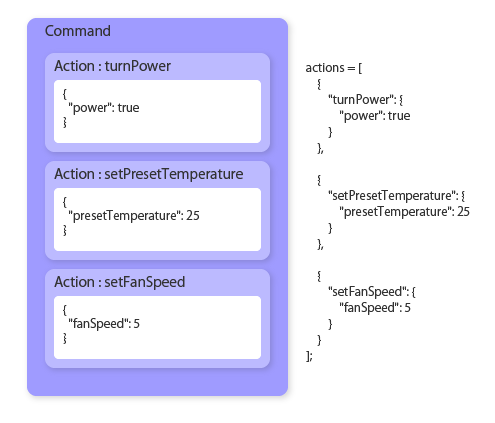
You can use any value format for the action parameter as long as the parameter is represented in JSON.
The thing will receive actions in the same order as set in
actions.Execute the command
Call the
postNewCommandmethod with the schema name, schema version, and action array to execute the command. The schema name and version can be used to distinguish the parameter format when the thing parses the JSON string. See Schema in the Function Guide for more information.The command execution is handled asynchronously. The promise returns
Commandand the error information when the execution is completed.
The following will happen after the method is executed.
then of the promise will be executed when Thing Interaction Framework receives the command. At this point, the command is not delivered to the thing yet, so the command result in the parameter Command is undefined. Thing Interaction Framework assigns a command ID for each Command execution. This ID can later be used to get the command result when the command is executed on the thing and its result is ready.
Thing Interaction Framework will send a request for executing the command to the thing via the MQTT push. The thing will execute the specified three actions accordingly after receiving the request.
Finally, the command result and error codes (if any) are uploaded to Thing Interaction Framework. Thing Interaction Framework will send a push notification to notify the corresponding command ID to the mobile application. The mobile application, using its push notification handler, can get the command result and error codes using the command ID. See Getting Command Result for the details.
Sending a portion of actions
You do not need to use all actions defined in a schema at once. You can send only the required action at the required scene.
For example, suppose you just want to send "power":false (power off). Since you do not need to configure the preset temperature and fan speed, you can send a command in the following way:
-
// Create an action array. const actions = [ {"turnPower":{"power":false}} ]; // Create a command request. const commandRequest = new ThingIF.PostCommandRequest("AirConditioner-Demo", 1, actions); // Execute the command. api.postNewCommand(commandRequest).then((command: ThingIF.Command) => { // Do something. }).catch((error: ThingIF.ThingIFError) => { // Handle the error. }); -
// Create an action array.
var actions = [
  {"turnPower":{"power":false}}
];

// Create a command request.
var commandRequest = new ThingIF.PostCommandRequest("AirConditioner-Demo", 1, actions);

// Execute the command.
api.postNewCommand(commandRequest).then(
  function(command) {
    // Do something.
  }
).catch(
  function(error) {
    // Handle the error.
  }
);
This time, only one action is set in the array. The command sent to the thing, therefore, will have only this action.
Sending with command details
You can register command details such as the title and description when you send a command.
-
// Create an action array. const actions = [ {"turnPower":{"power":true}}, {"setPresetTemperature":{"presetTemperature":25}}, {"setFanSpeed":{"fanSpeed":5}} ]; // Set a title, description, and metadata to be sent with a command. const title = "Power on"; const description = "Power on and set to 25 deg C"; const metaData = {"iconIndex":3, "issuer":"remoteController"}; // Create a command request from the detailed information. const commandRequest = new ThingIF.PostCommandRequest("AirConditioner-Demo", 1, actions, null, title, description, metaData); // Execute the command. api.postNewCommand(commandRequest).then((command: ThingIF.Command) => { // Do something. }).catch((error: ThingIF.ThingIFError) => { // Handle the error. }); -
// Create an action array.
var actions = [
  {"turnPower":{"power":true}},
  {"setPresetTemperature":{"presetTemperature":25}},
  {"setFanSpeed":{"fanSpeed":5}}
];

// Set a title, description, and metadata to be sent with a command.
var title = "Power on";
var description = "Power on and set to 25 deg C";
var metaData = {"iconIndex":3, "issuer":"remoteController"};

// Create a command request from the detailed information.
var commandRequest = new ThingIF.PostCommandRequest("AirConditioner-Demo", 1, actions, null, title, description, metaData);

// Execute the command.
api.postNewCommand(commandRequest).then(
  function(command) {
    // Do something.
  }
).catch(
  function(error) {
    // Handle the error.
  }
);
The command to execute is the same as the one in the first sample code but the constructor of PostCommandRequest uses title, commandDescription, and metadata to set the command details. You can use these as you like based on the specifications of your application as described in Command Details. See Command Details also for limits such as the maximum length of the fields.
Once the command is executed, you can get the set command details by the title, commandDescription, and metadata properties of the Command class. You can also get Command instances by the way described in Getting a List of Registered Commands below in order to get these properties.
Getting command result
When the thing uploads the command result, Thing Interaction Framework will notify the mobile app by sending an MQTT push notification.
The command ID is included in the payload of the push notification. The mobile application can get the entire command with this ID and fetch the command result. By checking the status code and error message in the command result, the mobile application will be able to know the command execution result.
The destination of the push notification with the command ID depends on whether the owner is a pseudo user or a normal user. See Implementation tips for more information.
The following sample code processes the push notification reception handler.
-
// Receive a push messsage. client.on("message", (topic, message, packet) => { if (topic === mqttTopic) { // Get the payload of the push message. const payload = JSON.parse(message.toString()); // Get the command ID from the payload. const commandID = payload.commandID; if (commandID) { console.log("A message arrived: " + commandID); } } }); -
// Receive a push messsage.
client.on("message", function(topic, message, packet) {
  if (topic === mqttTopic) {
    // Get the payload of the push message.
    var payload = JSON.parse(message.toString());

    // Get the command ID from the payload.
    var commandID = payload.commandID;
    if (commandID) {
      console.log("A message arrived: " + commandID);
    }
  }
});
This is what is happening in the sample code:
client.on("message", …)is implemented based on the specification of MQTT.js. The specified function is called when MQTT.js receives a PUBLISH command from the server side.- Get the ID of the command executed on the thing by getting
commandIDin the push notification's payload. If you use the push notification also for other purposes than getting command results, consider situations in which you do not getcommandID.
If the push notification is not properly delivered...
If the push notification does not arrive after the command is processed on the thing, check Initializing the push notification feature to resolve the issue. You might also want to try the Kii Cloud SDK tutorial to test if the Kii Cloud SDK push notification feature works fine with the simple program.
Please note that using the push notification feature with the Thing-IF SDK is a bit different from using it with the Kii Cloud SDK in the following manners:
- When using the Thing-IF SDK, the push notification is always delivered to both development and production environments.
- The Thing-IF SDK will wrap some Kii Cloud push notification features (i.e., topic creation, topic subscription, and message sending). These features will be executed automatically by the Thing-IF SDK when you execute the onboarding and when the corresponding event occurs.
Getting a command with the ID
You can get the details of the command using its command ID. By getting the command, you can reference the command result and take appropriate actions in your application.
-
// Get the command. api.getCommand(commandID).then((command: ThingIF.Command) => { // Get each of the action results. for (const resultValue of command.actionResults) { const actionName: string = Object.keys(resultValue)[0]; const succeeded: boolean = resultValue[actionName].succeeded; const errorMessage: string = resultValue[actionName].errorMessage; } }).catch((error: ThingIF.ThingIFError) => { // Handle the error. }); -
// Get the command.
api.getCommand(commandID).then(
  function(command) {
    // Get each of the action results.
    for (var i = 0; i < command.actionResults.length; i++) {
      var resultValue = command.actionResults[i];
      var actionName = Object.keys(resultValue)[0];
      var succeeded = resultValue[actionName].succeeded;
      var errorMessage = resultValue[actionName].errorMessage;
    }
  }
).catch(
  function(error) {
    // Handle the error.
  }
);
Here is what is happening in the sample code:
- Execute the
getCommandmethod of theThingIFAPIinstance (api) with the command ID as an argument to get the entire command from the server. - Extract an array of the action results from the command's
actionResults. Each element of the array is an object with one key-value pair. Its key is the action name and the value is the action result.
For example, command.actionResults in the sample code in Executing Commands returns an array of objects as below. The above sample code processes the array with the for loop to get the action name, flag of success or failure, and error message.
[
  {
    "turnPower": {
        "succeeded": true
    }
  },
  {
    "setPresetTemperature": {
      "errorMessage": "Too cold in the room",
      "succeeded": false
    }
  },
  {
    "setFanSpeed": {
      "succeeded": true
    }
  }
]
Getting a list of registered commands
You can get a list of all commands that are registered on the server.
If there are many registered commands, you can use the pagination. If there are 30 registered commands, for example, you can get ten commands per page. In this case, you can get all commands by parsing three pages, ten commands at a time.
The following is the sample code.
-
var callback = (error: Error, commands: ThingIF.QueryResult<ThingIF.Command>)=> { if (error) { // Handle the error. return; } for (const command of commands.results) { // Do something with each command. } // If the next page exists if (commands.paginationKey) { // Get the next page of the list. api.listCommands(new ThingIF.ListQueryOptions(null, commands.paginationKey), callback); } }; // Get a list of commands. api.listCommands(new ThingIF.ListQueryOptions(), callback); -
var callback = function(error, commands) {
  if (error) {
    // Handle the error.
    return;
  }

  for (var i = 0; i < commands.results.length; i++) {
    var command = commands.results[i];
    // Do something with each command.
  }

  // If the next page exists
  if (commands.paginationKey) {
    // Get the next page of the list.
    api.listCommands(new ThingIF.ListQueryOptions(null, commands.paginationKey), callback);
  }
};

// Get a list of commands.
api.listCommands(new ThingIF.ListQueryOptions(), callback);
The listCommands method gets a list of commands registered to the server. The sample code uses a callback because you need to create a recursive loop structure to get all commands, though this method supports promises. See the implementation example in Querying KiiObjects to learn how to create a loop with promises.
The second argument of the ListQueryOptions specified in the listCommands method indicates the current page. Specifying the ListQueryOptions without the pagination key returns the first page. commands.paginationKey returns the next pagination key when a list of commands is retrieved with the callback of the listCommands method. Get subsequent commands by specifying the next pagination key. When all commands are retrieved, the value of commands.paginationKey in the callback becomes undefined.
The first argument of the ListQueryOptions is the number of commands to be retrieved on one page. If you do not specify the argument or set a null value, the value configured on the server side will be automatically used. Commands are retrieved on a best effort basis and you might not be able to get the specified number of commands. The commands which are not retrieved on a page will be retrieved on a next page.
Commands are retrieved in a forward order only. You cannot retrieve commands in a backward order.
commands.results in the callback contains a list of retrieved commands.